Easy Ikea Bar Cart Hack
- Jun 19, 2020
- 3 min read
Updated: Jul 31, 2020
Hi there! We moved to a new site, check this post out there!
This post may contain affiliate links, where we get a small commission at no extra cost to you!
When we moved into our apartment about a month ago, we didn't really have anything to fill this empty corner between our kitchen and living room. We both really liked the idea of filling it with a bar cart, but we wanted it to match all the other furniture we had and didn't want to spend over $100. Nothing we found had the bronze and wood combination we wanted (so it could match our media stand) while also staying inexpensive, so we decided to make our own from a black IKEA Nissafors cart! Most of the bar cart hacks we found online were just IKEA carts spray painted gold with marble contact paper on the shelves, so we made our own design to fit what we wanted. We also made this modern wall hanging to go above, which you can buy at our Etsy store!

Materials:
1 in x 12 in x 6 ft board cut into three 18 3/4 in pieces: $12
IKEA Nissafors Cart: $24
Things we already had: saw, sander, stain, polyurethane, brushes, drop cloth
Total cost: $41
Step 1: Pick out wood for shelves
Since the cart was a little less than a foot in width, we decided to get a 1x12x6 plank from Home Depot, which is 11 1/4 in in actual width. Our plan was to get it cut there, but the cutting station was out of order that day. So we returned to our apartment to cut and sand there!
Step 2: Cut and sand wood
Since we don't own super legit tools, we just used our jigsaw to cut our wood into 3 different pieces 18 3/4 inches in length. If you have something that makes straighter cuts definitely use that, but the jigsaw works great for us when we draw a nice straight line to follow. Then we used our palm sander with 100 grit sand paper since we just wanted to smooth out the cuts. If you wanted to make your shelves softer, you can also use finer sand paper after. We ended up using the remaining wood to make a serving tray for a friend, so we sanded, stained, and finished that piece as we were making our shelves.
Step 3: Stain and polyurethane shelves
Next, we used 1 coat of our Minwax Special Walnut stain (the 1 can has now covered 3 projects!) and let that sit over night. We turned our little balcony into a workspace which worked great, since we don't have our own garage or anything.

Then we finished the shelves with 1 coat of satin Minwax polyurethane and let that sit for about 5 hours since it was fast-drying.
Step 4: Assemble cart
We actually assembled the cart before we started this process and used it as a bar cart for a bit to make sure we liked it and everything fit. This way, if anything was wrong we could still return it, which you definitely can't do after spray painting it.

Step 5: Spray paint cart
Next, we took the cart outside and spray painted it. I recommend getting two cans because we ran out just as we were finishing the last shelf. This step was really quick and easy, and the cart was dry after just 10 minutes!
Step 5: Add shelves to cart
After we brought the cart back inside, we just placed the shelves inside! If your shelves don't slide right in at first, you can place a cloth on your shelf and lightly hammer the corners to get them in.

Step 6: Decorate!
Originally, we wanted to add a hanging wine rack underneath the first shelf, since that shelf had holes in the metal, but when we measured our wine glasses they would almost be resting on the second shelf. You could still do this if you have shorter wine glasses, or even add a hanging wine bottle holder there. We just decided it wasn't really worth it. So we added a plant, our cocktail books and shaker, all our favorite glasses, and some bottles of wine and gin!


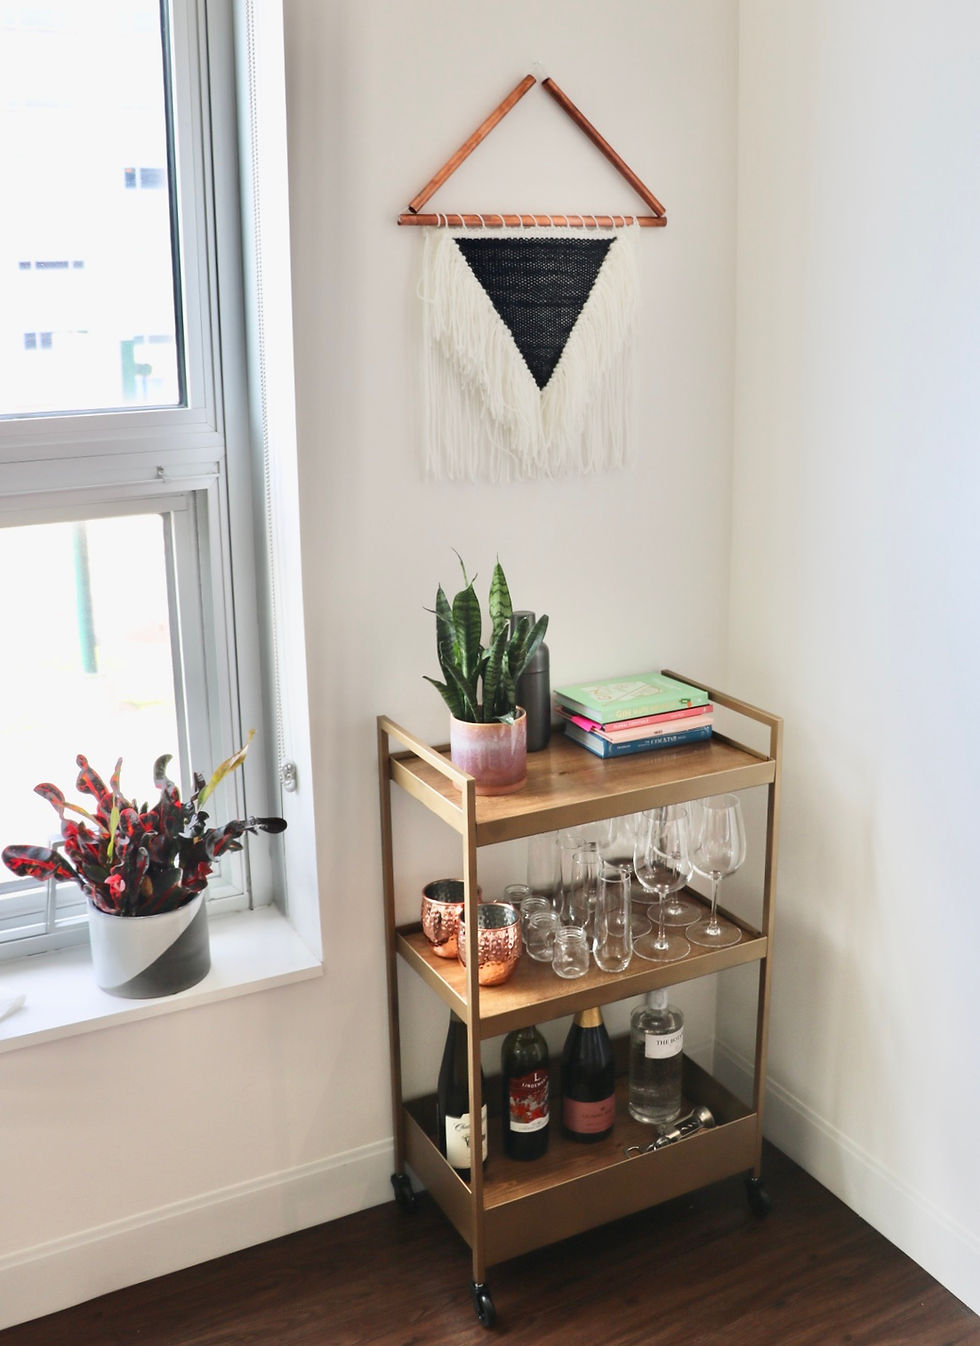
We love how this turned out- hope this helps anyone wanting to make an inexpensive bar cart!
~Ali
Pin this post to Pinterest!


Comments